mardi, décembre 28, 2010
dimanche, décembre 19, 2010
jeudi, décembre 16, 2010
Tarte aux pomme 2
Second tarte aux pommes (apple pie) made it to this website :D
The recipe is taken from La cuisine de Monica. It's a great website (in french though) where the cook is a grandma and her grandson did the filming of the video and webstuff. Sadly, mamie Monica passed away 20th October 2010 :(
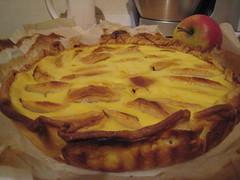
So here is the recipe...
Tarte aux pomme à la canelle
(Adapted from La cuisine de Monica)
Ingredients:
1 pie dough
5 apples
100g sugar
3 small eggs (or 2 if medium or large eggs0
200ml liquid cream
2 tsp cinnamon powder
2 tsp ground almond
Methods:
- Put the pie dough in the pie baking pan and put some weights (usually dried beans. I used almonds) and bake at 200C / 15min.
- Check that the dough is dry
- Take out from the oven and spread ground almond
- In a small bowl, mix 50g sugar and cinnamon powder
- Peel and cut the apples in 8 pieces. Arrange the apples on the pie dough. Add in the sugar/cinnamon mix.
- Bake for 10min à 200°C. The apples should be soft on the outside but still firm in the inside.
- In a mixing bowl, mix 50g sugar, eggs and the cream. Pour into the cooked apples.
- Bake for last time in the oven, this time at 180° for 30min. Check on the baking. You can do the toothpick test. The pie should be slightly brown.
Then it's time to dig in!!
The recipe is taken from La cuisine de Monica. It's a great website (in french though) where the cook is a grandma and her grandson did the filming of the video and webstuff. Sadly, mamie Monica passed away 20th October 2010 :(

So here is the recipe...
Tarte aux pomme à la canelle
(Adapted from La cuisine de Monica)
Ingredients:
1 pie dough
5 apples
100g sugar
3 small eggs (or 2 if medium or large eggs0
200ml liquid cream
2 tsp cinnamon powder
2 tsp ground almond
Methods:
- Put the pie dough in the pie baking pan and put some weights (usually dried beans. I used almonds) and bake at 200C / 15min.
- Check that the dough is dry
- Take out from the oven and spread ground almond
- In a small bowl, mix 50g sugar and cinnamon powder
- Peel and cut the apples in 8 pieces. Arrange the apples on the pie dough. Add in the sugar/cinnamon mix.
- Bake for 10min à 200°C. The apples should be soft on the outside but still firm in the inside.
- In a mixing bowl, mix 50g sugar, eggs and the cream. Pour into the cooked apples.
- Bake for last time in the oven, this time at 180° for 30min. Check on the baking. You can do the toothpick test. The pie should be slightly brown.
Then it's time to dig in!!
vendredi, décembre 10, 2010
Dark Chocolate Red Velvet Cake Pops
This is my Saint Nicolas Bake Challenge. Today I had Saint Nicolas Office Party, so I decided few days ago that I will do cake pops. Cake pops are a huge trend in the US nowadays after the cupcakes phenomenon. I never feel attracted to do cupcakes challenge. I think the reason is the logistic issue. Frosted cupcakes are not easy to move from one place to another. So here I am jumping on the cake pops bandwagon!

Bakerella from bakerella.com had a huge success promoting cake pops. She published cake pops book and she appeared in Martha Stewart's show doing the muffin cake pops. The best and the worst about cake pops are that they are easy to make and you can do different kinds of varieties. You can use lemon cake, butter cake, chocolate cake, red velvet cake, orange cake... I mean anything. Then there is the decoration part. Americans use a lot of Candy Melts. These are sugar flavored pallets, kind of artificial chocolate pallets.
After so many research, I finally settled down with red velvet cake and dark chocolate cover.
Why red velvet cake?
- For sometimes I have been eyeing red velvet cake recipes. I like the rich red color of the cake and the fact that it's always frosted with cream cheese. Since the cake pop uses cream cheese frosting, so I think it is a good time to try this recipe.
Why dark chocolates?
- At first I decided to do white chocolate cover. But as I melt some white chocolates, it looks very thick. So I stopped and stored it. I've worked with a lot of dark chocolates lately and I feel more comfortable with dark chocolates.
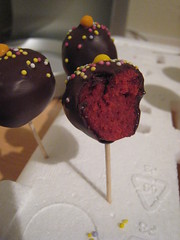
Enough said.. Since I only have evening after work and gym to do this challenge, I decided to split the process into 3 parts. This recipe gives about 80-90 cake pops.
D-2
Part 1: Red Velvet Cake
Ingredients
2 1/2 cups cake flour (I used all-purpose flour and it works fine)
1 tsp baking powder
1 tsp salt
2 tbsp unsweetened cocoa powder
2 1-ounce bottle of red paste coloring
1 cup (225g) unsalted butter, room temperature
1 1/2 cups sugar
2 eggs, room temperature
1 tsp vanilla extract
1 cup buttermilk, room temperature
1 tsp baking soda
1 tsp white vinegar
Methods
- Butter and flour cake pan and set aside. Preheat oven to 170C.
- In a bowl, sift flour, baking powder, and salt.
- In another bowl, mix cocoa powder with food coloring.
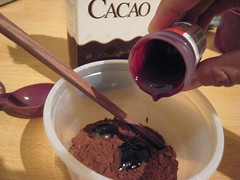
- In a mixer, cream butter and sugar until fluffy. Add eggs on at a time, add vanilla, and the red cloring-cocoa mix.
- When mixture is well combined, add 1/3 of flour mix, mix well, then add 1/2 of buttermilk, then add 1/3 of flour mix, then other 1/2 butter milk, then finish off the flour mix (each time mix until well combined).
- In a small bowl, mix baking soda with vinegar, and quickly add to the batter.
- Mix in high speed for few seconds.
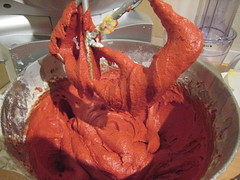
- Pour mixture into cake pan and bake for about 30-35 minutes (do the toothpick test).
- Let the cake cool at room temperature.
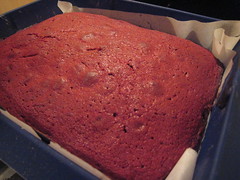
D-1
Part 2: Destroy the cake
Cream cheese frosting
2 250g cream cheese (usually Philadelphia)
56g unsalted butter, room temperature
2 tsp red coloring (this is optional - just to preserve the red coloring in the red velvet cake. If you are using butter cake or lemon cake, no need to add food coloring)
2 1/2 cups icing sugar (confectioners sugar)
pinch of salt
Methods
- In a mixer, combine cream cheese and butter, and beat until smooth
- Add vanilla, salt and gradually add in sugar, and coloring
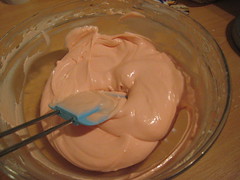
- Take the red velvet cake, then crumble it. You may use spatula or give it a spin in the food mixer/food processor.
- In a big bowl, add in the frosting bit by bit into the cake crumbs.
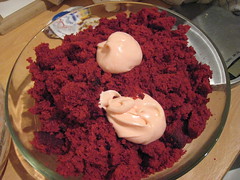
- Add in and mix well until all frosting are being used.
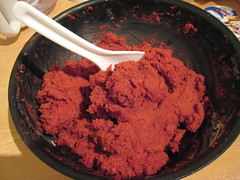
- Try rolling a small ball in your palms. If it stays together, and none stays on your palm, then it means your mixture is ready.
- Start making the balls with a size a bit smaller than size of a golf ball.
- Put those balls inside the fridge for about 1-2 hours.
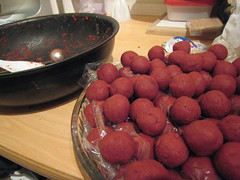
Part 3: Assembling the pops
- Melt dark chocolates in bain marie, you may add a bit of butter to make it fluid a bit.
- Dip the tip of the stick in the chocolate, then pierce the chilled ball until 3/4 deep. Let it cool. This step is important to make sure the ball did not slide down the stick.
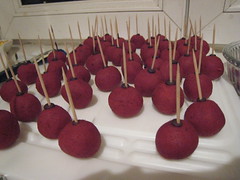
- Repeat the dipping stick and piercing until the last ball.
- Start with the first cake pop, dip the ball into the chocolate. Give it a swirl to get rid of any access chocolate.
- Put it stand on a polysterine block. Decorate as you wish. I put a sugared cereal on top and sprinkle with colorful sugar sprinkles and chocolate sprinkles.
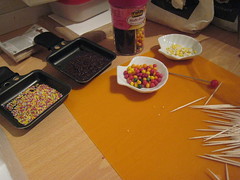
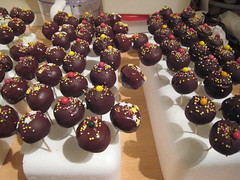
There you go!!! I would be happy to do these cake pops again :D

Bakerella from bakerella.com had a huge success promoting cake pops. She published cake pops book and she appeared in Martha Stewart's show doing the muffin cake pops. The best and the worst about cake pops are that they are easy to make and you can do different kinds of varieties. You can use lemon cake, butter cake, chocolate cake, red velvet cake, orange cake... I mean anything. Then there is the decoration part. Americans use a lot of Candy Melts. These are sugar flavored pallets, kind of artificial chocolate pallets.
After so many research, I finally settled down with red velvet cake and dark chocolate cover.
Why red velvet cake?
- For sometimes I have been eyeing red velvet cake recipes. I like the rich red color of the cake and the fact that it's always frosted with cream cheese. Since the cake pop uses cream cheese frosting, so I think it is a good time to try this recipe.
Why dark chocolates?
- At first I decided to do white chocolate cover. But as I melt some white chocolates, it looks very thick. So I stopped and stored it. I've worked with a lot of dark chocolates lately and I feel more comfortable with dark chocolates.

Enough said.. Since I only have evening after work and gym to do this challenge, I decided to split the process into 3 parts. This recipe gives about 80-90 cake pops.
D-2
Part 1: Red Velvet Cake
Ingredients
2 1/2 cups cake flour (I used all-purpose flour and it works fine)
1 tsp baking powder
1 tsp salt
2 tbsp unsweetened cocoa powder
2 1-ounce bottle of red paste coloring
1 cup (225g) unsalted butter, room temperature
1 1/2 cups sugar
2 eggs, room temperature
1 tsp vanilla extract
1 cup buttermilk, room temperature
1 tsp baking soda
1 tsp white vinegar
Methods
- Butter and flour cake pan and set aside. Preheat oven to 170C.
- In a bowl, sift flour, baking powder, and salt.
- In another bowl, mix cocoa powder with food coloring.

- In a mixer, cream butter and sugar until fluffy. Add eggs on at a time, add vanilla, and the red cloring-cocoa mix.
- When mixture is well combined, add 1/3 of flour mix, mix well, then add 1/2 of buttermilk, then add 1/3 of flour mix, then other 1/2 butter milk, then finish off the flour mix (each time mix until well combined).
- In a small bowl, mix baking soda with vinegar, and quickly add to the batter.
- Mix in high speed for few seconds.

- Pour mixture into cake pan and bake for about 30-35 minutes (do the toothpick test).
- Let the cake cool at room temperature.

D-1
Part 2: Destroy the cake
Cream cheese frosting
2 250g cream cheese (usually Philadelphia)
56g unsalted butter, room temperature
2 tsp red coloring (this is optional - just to preserve the red coloring in the red velvet cake. If you are using butter cake or lemon cake, no need to add food coloring)
2 1/2 cups icing sugar (confectioners sugar)
pinch of salt
Methods
- In a mixer, combine cream cheese and butter, and beat until smooth
- Add vanilla, salt and gradually add in sugar, and coloring

- Take the red velvet cake, then crumble it. You may use spatula or give it a spin in the food mixer/food processor.
- In a big bowl, add in the frosting bit by bit into the cake crumbs.

- Add in and mix well until all frosting are being used.

- Try rolling a small ball in your palms. If it stays together, and none stays on your palm, then it means your mixture is ready.
- Start making the balls with a size a bit smaller than size of a golf ball.
- Put those balls inside the fridge for about 1-2 hours.

Part 3: Assembling the pops
- Melt dark chocolates in bain marie, you may add a bit of butter to make it fluid a bit.
- Dip the tip of the stick in the chocolate, then pierce the chilled ball until 3/4 deep. Let it cool. This step is important to make sure the ball did not slide down the stick.

- Repeat the dipping stick and piercing until the last ball.
- Start with the first cake pop, dip the ball into the chocolate. Give it a swirl to get rid of any access chocolate.
- Put it stand on a polysterine block. Decorate as you wish. I put a sugared cereal on top and sprinkle with colorful sugar sprinkles and chocolate sprinkles.


There you go!!! I would be happy to do these cake pops again :D
dimanche, décembre 05, 2010
Jam cookies
Second recipe in winter Sunday is the Jam cookies. I made this type before when I was in Nancy. It was with cinnamon cookies and raspberry jam. This time, the recipe calls for usual buttery cookies with raspberry jam. Safe enough. But hubby asked me to make it with strawberry jam... Oh ok :D
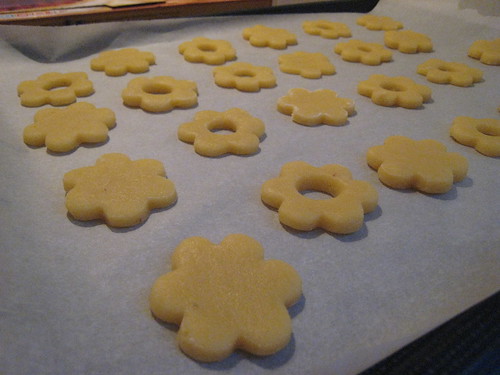
The job is a bit tedious. First of all the mixture gives a big ball of dough. Then comes the cutting. Need to make the bottom part and the top part with hole in the middle. I need to keep in check the number of bottom part and number of top part. You don't want to have any topless or bottomless cookie with jam right? hehehehe The baking time is 10 mins max. So no time to sit down... By the time you clean up some stuff, it's time to unload and reload!
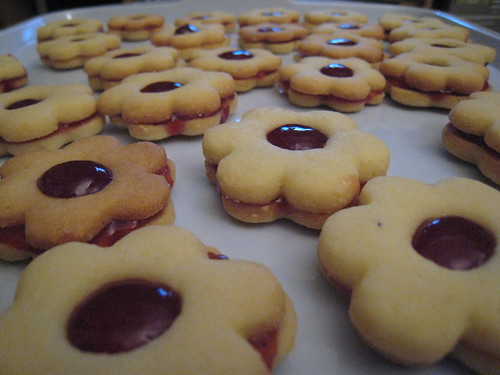
After that, there is the assembling part. For this I am already low in energy so I asked my helpful husband to help me. So, he did the spread and I put the top on. Phew!
But the look of the cookies and the taste... worth the while! :D
Need to check the same number of bottom and top
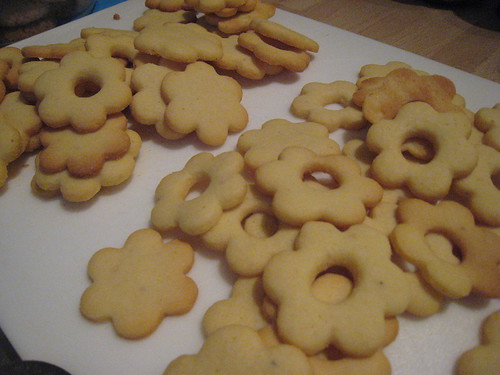
Let it cool down
My hand model showing the assembling job

Beauties
Here's the recipe:
(Adapted from magazine Vivre à table)
Ingredients:
420g flour
210g sugar
2 tsp vanilla sugar
A pinch of salt
125g ground hazelnuts (I used ground almonds)
250g cold butter
1/2 lemon, zest and juice (I used 2 tbsp lemon juice only)
2 eggs
Strawberry or raspberry jams
Icing sugar (optional)
Methods:
- In a bowl, mix the flour, the sugar, vanilla sugar, salt and ground almonds/hazelnuts.
- Add in cold butter (cut in cubes), lemon juice and eggs.
- Knead the mixture until you get a smooth dough.
- Leave the dough in the fridge for minimum of 30 mins (the longer the better)
- After min. of 30 mins, pre-heat oven at 190C.
- Roll out the dough into approx. 0.5 cm). Use the cookie cutter of your choice, the top part with hole in the middle.
- Bake between 8-10 minutes.
- Once the cookies are cool (after 1-2 hours), heat the jam in the microwave.
- Using small spoon, spread the jam on the bottom part cookie (without hole), then sandwich it with the top cookie (with hole).
The job is a bit tedious. First of all the mixture gives a big ball of dough. Then comes the cutting. Need to make the bottom part and the top part with hole in the middle. I need to keep in check the number of bottom part and number of top part. You don't want to have any topless or bottomless cookie with jam right? hehehehe The baking time is 10 mins max. So no time to sit down... By the time you clean up some stuff, it's time to unload and reload!
After that, there is the assembling part. For this I am already low in energy so I asked my helpful husband to help me. So, he did the spread and I put the top on. Phew!
But the look of the cookies and the taste... worth the while! :D
Need to check the same number of bottom and top

Let it cool down

My hand model showing the assembling job

Beauties

Here's the recipe:
(Adapted from magazine Vivre à table)
Ingredients:
420g flour
210g sugar
2 tsp vanilla sugar
A pinch of salt
125g ground hazelnuts (I used ground almonds)
250g cold butter
1/2 lemon, zest and juice (I used 2 tbsp lemon juice only)
2 eggs
Strawberry or raspberry jams
Icing sugar (optional)
Methods:
- In a bowl, mix the flour, the sugar, vanilla sugar, salt and ground almonds/hazelnuts.
- Add in cold butter (cut in cubes), lemon juice and eggs.
- Knead the mixture until you get a smooth dough.
- Leave the dough in the fridge for minimum of 30 mins (the longer the better)
- After min. of 30 mins, pre-heat oven at 190C.
- Roll out the dough into approx. 0.5 cm). Use the cookie cutter of your choice, the top part with hole in the middle.
- Bake between 8-10 minutes.
- Once the cookies are cool (after 1-2 hours), heat the jam in the microwave.
- Using small spoon, spread the jam on the bottom part cookie (without hole), then sandwich it with the top cookie (with hole).
Oat Coconut Cookies
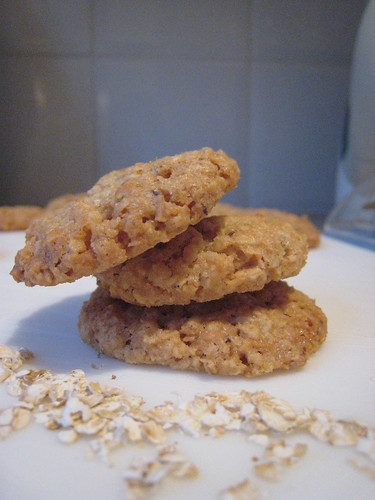
It guess it's time to start Xmas baking and using my new Kenwood that I got for birthday last month! For my birthday I also received several cooking magazines. One of the magazines has the recipes for Xmas cookings and bakes. After 2 weeks of "studying" the magazines, I finally picked up 2 recipes! Yippie!! The idea is to use up some of the things in my kitchen (except for butter and eggs), and did I mention the new Kenwood? :D hehehehe
One of the things is rolled oats, which was mistakenly bought few weeks ago. I always thought oat cookies are yummy. Never tried it before, so I guess it's time to do it. There is a recipe in the magazine, so I'm game!
First, the Kenwood beater :D I'm so nervous using it. First time is always like this I spose :D
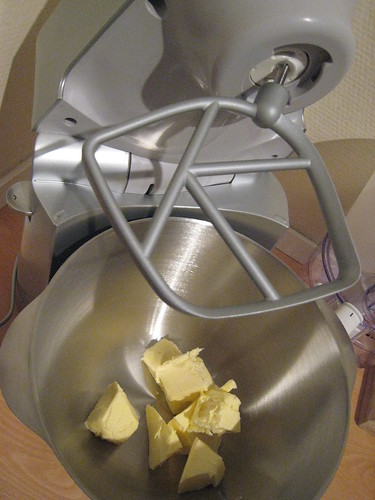
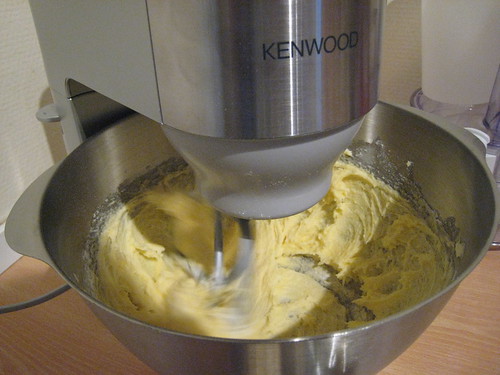
Look! Hands free!!!! Weeeee.....
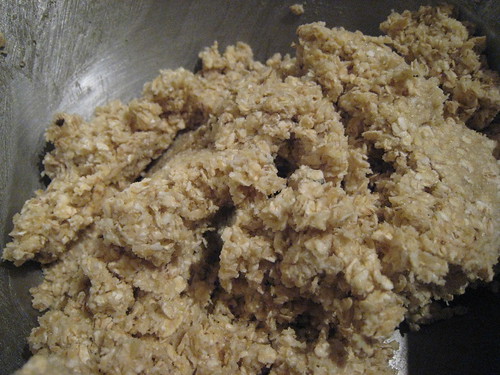
Ready for the oven...
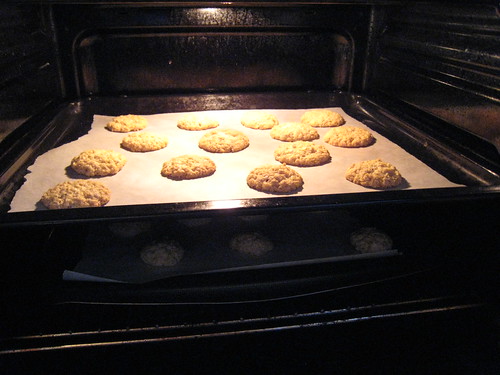
Looks so great in the oven...
Bucket's of oat coconut cookies...
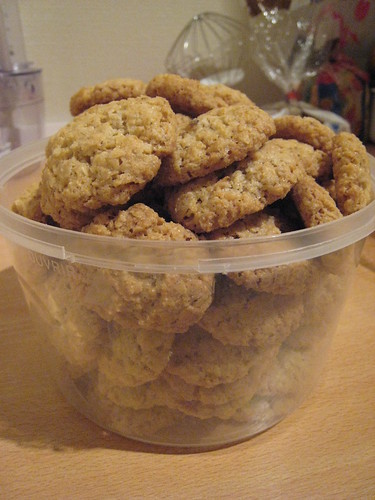
Here's the recipe:
(Adapted from magazine Vivre à table)
Ingredients:
200g butter
2 tsp vanilla sugar
200g sugar
A pinch of salt
1 egg
325g rolled oats
25g flour
50g dried coconut
1 tsp baking powder
Methods:
- Pre-heat oven at 190C.
- In a mixer, beat butter, vanilla sugar, sugar, salt and egg.
- Add in oats, coconuts, flour and baking powder.
- Knead until you get a well-mixed mixture.
- Roll mixture into small balls. Place them on the baking tray with enough space between then. The mixture will spread a bit.
- Bake for about 10-15 minutes.
- Take out from the oven and let cool.
Note: You can also replace the dried coconuts with almond flakes or hazelnut flakes.
lundi, novembre 29, 2010
Blanquette de veau
Another winter comfort food in my house is Blanquette de veau. It's filling, makes you warm till your toes and yummy!
Here it goes, my place without the potatoes:

Ingredients
About 1 kg veal (shoulders/ribs)
1 tbsp butter
1 tbsp flour
20cl creme liquid (fresh cream) - I use 3% fat Bridelight
1 egg yolk
1 cube beef stock (non-fat)
1/2 kg potatoes
About 400g canned carrots
Method:
- Cook the veal with water enough to cover the meat
- Steam the potatoes
(I cooked both in the pressure cooker - veal in the pot and potatoes on the top steam basket)
- In a casserole, put in butter, and add flour to the melted butter (roux blanc)
- Then add a bit of water from cooking the veal. Add bit by bit until you get a sauce.
- Add in beef stock cube. Stir until dissolve.
- In a bowl, add creme liquid to the egg yolk and stir together
- Add it into the casserole
- Add in the cooked veal,carrots and potatoes (cut into big chunks)
- If the sauce is thick, add in some water from cooking the veal.
- Check the taste (with the stock cube I don't need salt)
- Simmer slowly.
- Serve while hot :D Bon appetit!
Hubby's plate with potatoes:
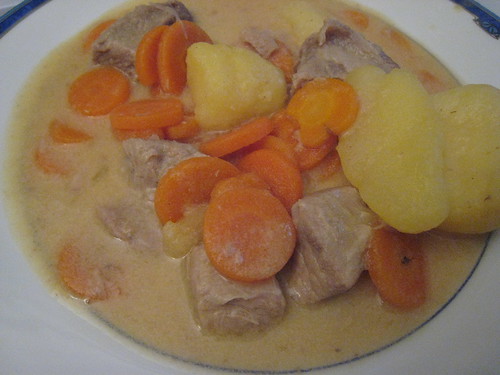
Here it goes, my place without the potatoes:

Ingredients
About 1 kg veal (shoulders/ribs)
1 tbsp butter
1 tbsp flour
20cl creme liquid (fresh cream) - I use 3% fat Bridelight
1 egg yolk
1 cube beef stock (non-fat)
1/2 kg potatoes
About 400g canned carrots
Method:
- Cook the veal with water enough to cover the meat
- Steam the potatoes
(I cooked both in the pressure cooker - veal in the pot and potatoes on the top steam basket)
- In a casserole, put in butter, and add flour to the melted butter (roux blanc)
- Then add a bit of water from cooking the veal. Add bit by bit until you get a sauce.
- Add in beef stock cube. Stir until dissolve.
- In a bowl, add creme liquid to the egg yolk and stir together
- Add it into the casserole
- Add in the cooked veal,carrots and potatoes (cut into big chunks)
- If the sauce is thick, add in some water from cooking the veal.
- Check the taste (with the stock cube I don't need salt)
- Simmer slowly.
- Serve while hot :D Bon appetit!
Hubby's plate with potatoes:

jeudi, novembre 18, 2010
Birthday project
Since my birthday falls on Saturday this year, I decided to bring some baked goodies during the weekday. I take Friday off, so that means I wl bring in the cakes on Thursday.
I decided to bake 3 different kinds of cakes this year. I've narrowed down 3 recipes and arranged them in the order what to be baked first. Yes, it needs planning because I only have a limited time to bake in the evening. After work I have gym classes to attend, and no I don't want to skip them. It's also good to spread the bakings over some days because:
1. I won't be too tired
2. The oven won't be too tired
3. Not so much dishes to be in the dishwasher at the same time
4. Cakes are better after 24 hours
I baked the cakes in the following order:
Tuesday night: Cream Cheese Chocolate Brownies
Wednesday night: Apple Cinnamon Bread and Lemon Mini muffin
Thursday morning: Eat time!
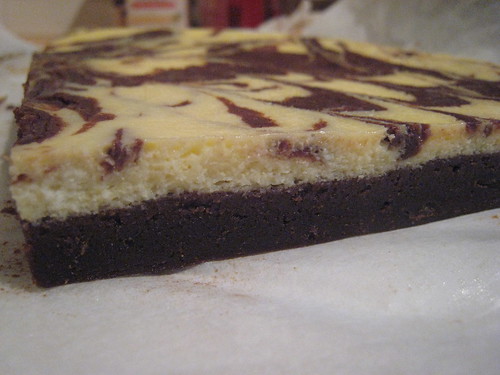
Cream Cheese Chocolate Brownies
I like making the Chewy Choco Brownies. I think I made it 3 times within 1 and half month!
This time I added cream cheese topping to the recipe. The recipe is taken from Joy of Baking website. It has the marble effect as well. I'm not that artistic, so the marble is more like swish swash swirl. It is so yummy and the brownies are dense, I think because it is 'protected' by the cream cheese. I made this first because cheese cake is known to be best refrigerated overnight. It is proven true!!!! When it's still chill out from the fridge, have a glass or pan filled with hot water. Before each cut, put the knife in the hot water, then wipe the knife, and you'll have a clean cut brownies.
Choco Chewy Brownies recipe - base
Cream Cheese Topping recipe - topping
Apple Cinnamon Bread
This is an easy recipe too. There is no need to use machine. Dump all ingredients and mix well.
Apple Cinnamon Bread recipe
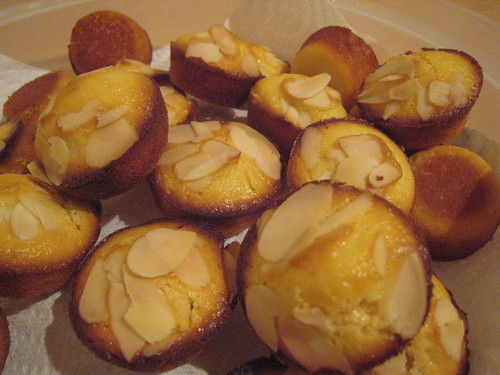
Lemon Mini Muffin
I have 2 trays of mini muffins and I seldom you them. Why? Because it's always easier to bake 1 big cake! Also, it's time consuming to grease the trays and from previous experience, I had trouble getting them out (huhuhu) But it has been for some time that I want to use the trays. I found the lemon mini muffin recipe, and decided to do it. For the first time I used baking spray. Wow, it's amazing! Just spray on the trays and the mini muffin came out so pretty :D
I decided to bake 3 different kinds of cakes this year. I've narrowed down 3 recipes and arranged them in the order what to be baked first. Yes, it needs planning because I only have a limited time to bake in the evening. After work I have gym classes to attend, and no I don't want to skip them. It's also good to spread the bakings over some days because:
1. I won't be too tired
2. The oven won't be too tired
3. Not so much dishes to be in the dishwasher at the same time
4. Cakes are better after 24 hours
I baked the cakes in the following order:
Tuesday night: Cream Cheese Chocolate Brownies
Wednesday night: Apple Cinnamon Bread and Lemon Mini muffin
Thursday morning: Eat time!
Cream Cheese Chocolate Brownies
I like making the Chewy Choco Brownies. I think I made it 3 times within 1 and half month!
This time I added cream cheese topping to the recipe. The recipe is taken from Joy of Baking website. It has the marble effect as well. I'm not that artistic, so the marble is more like swish swash swirl. It is so yummy and the brownies are dense, I think because it is 'protected' by the cream cheese. I made this first because cheese cake is known to be best refrigerated overnight. It is proven true!!!! When it's still chill out from the fridge, have a glass or pan filled with hot water. Before each cut, put the knife in the hot water, then wipe the knife, and you'll have a clean cut brownies.
Choco Chewy Brownies recipe - base
Cream Cheese Topping recipe - topping

Apple Cinnamon Bread
This is an easy recipe too. There is no need to use machine. Dump all ingredients and mix well.
Apple Cinnamon Bread recipe
Lemon Mini Muffin
I have 2 trays of mini muffins and I seldom you them. Why? Because it's always easier to bake 1 big cake! Also, it's time consuming to grease the trays and from previous experience, I had trouble getting them out (huhuhu) But it has been for some time that I want to use the trays. I found the lemon mini muffin recipe, and decided to do it. For the first time I used baking spray. Wow, it's amazing! Just spray on the trays and the mini muffin came out so pretty :D

I think we can expect more mini muffins in the future!!!!
I hope my office mates enjoyed them as much as I enjoyed baking the cakes :D
dimanche, novembre 07, 2010
Kuih Bakar
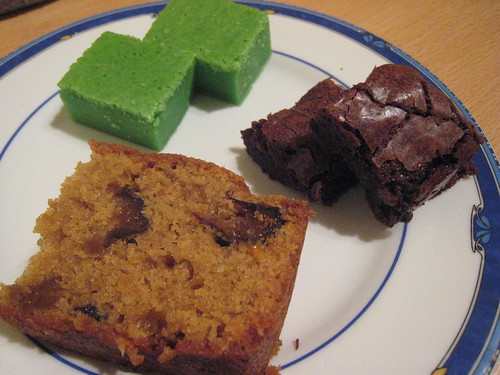
Three different types of cakes in one afternoon? Yes! :D There is only 1 cake which is new recipe, Kuih Bakar. My sister bought the pandan paste for me some time ago, and I have been waiting the right moment to use it.
As for the chocolate brownies, I used the fudgy chewy brownies recipe which I have been using before. It's a winner and this time I make sure that I do not over-bake it. It turned out chewy and fudgy! The best result so far :D
The raisin prune cake is something adapted from the Fruitcake recipe using brown sugar. Actually I planned to make mixed fruitcake again, but they ran out of candied mix fruit. My hubby thought it would be fun to test with prunes instead. I'm up for testing :D
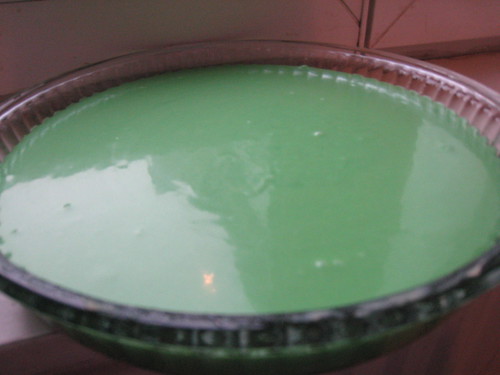
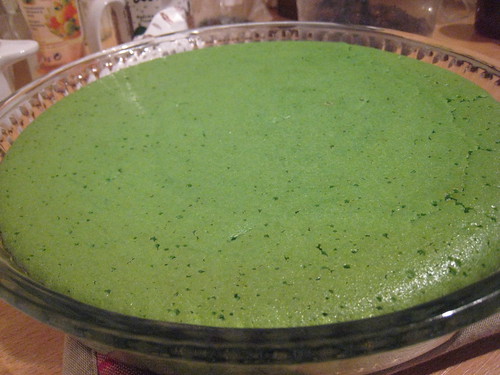
Kuih Bakar
(Adapted from My Kitchen Snippers)
Ingredients :
1 1/4 cups of sugar
2 cups of flour
1 cup of pandan juice (6 pandan leaves + 1 cup of water - blended)
2 1/4 cups of coconut milk
4 large eggs
2 tbsp of melted butter
1 tsp of pandan paste
few drops of green food coloring
1 tbsp of sesame seeds (optional)
1) Pre-heat oven to 325 degree F and greased a baking pan.
2) Mix all the above ingredients except sesame seeds until well combined.
3) Pour mixture into baking pan and sprinkle with some sesame seeds and bake until golden brown or skewer comes out clean when tested. It should take an hour.
4) Cool it down before cutting.
Note:
I skipped the pandan juice and the sesame.
Instead I added 1 tsp more of pandan paste.
lundi, novembre 01, 2010
Grilled chicken wings
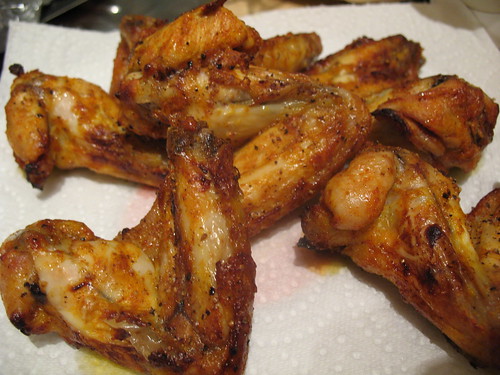
My favorite meal at the moment is grilled chicken wings. I hope I didn't get any side effects by eating too many chicken wings!
My usual marinate is with yoghurt, tandoori mix, curry powder, salt and pepper. Sometimes I tried to change the marinate recipe, but I love the combination of yoghurt and spices.
I hope to find other marinate recipe so that I can do some varieties. Not that I am sick of this recipe... :D
My usual marinate is with yoghurt, tandoori mix, curry powder, salt and pepper. Sometimes I tried to change the marinate recipe, but I love the combination of yoghurt and spices.

I hope to find other marinate recipe so that I can do some varieties. Not that I am sick of this recipe... :D
Fruitcake - revisited
About two weeks ago I planned to make another fruitcake (the bake one). I got all ingredients but somehow there is a change of plan. I baked something else than the fruitcake.
Anyway, it's a long weekend, and it's such a waste of time if I didn't bake anything. Right? :D
One hour later, the cake is in the oven, and hope it tastes better than last one.
Indeed the cake is better than the last one. I like the brown color of the cake and the texture is moister and softer. It's indeed a keeper!

FYI, I tweaked the previous recipe a bit. The previous recipe is here.
This is the tweaked recipe:
Ingredients:
230 grams unsalted butter
200 grams packed brown sugar
4 eggs
50 grams ground hazelnut
About 150gm mixed candied fruits, raisins
Splash of lemon juice
230 grams all-purpose flour
1 teaspoon baking powder
1/2 teaspoon vanilla essence
1/4 teaspoon salt
Methods:
- Pre-heat oven 160C, line the baking tin (20cm) with baking paper and grease it with butter.
- Beat butter, sugar until fluffy.
- Add one by one eggs, vanilla essence
- Fold in ground hazelnut
- Splash some lemon juice on the fruits, then cover the fruits with flour. Like this they are not stick to each other.
- Fold in fruits in the batter
- Sift flour, baking powder, salt
- Add progressively into the batter, fold in until all are well incorporate.
- At this point, the batter is 'heavy'.
- Spoon the batter into baking tin
- Bake in the oven for about 1 hour on 160C, then reduce to 150C and bake until about 30mins-1 hour. Test with skewer, when the skewer comes out clean with a bit of moist crumbs.
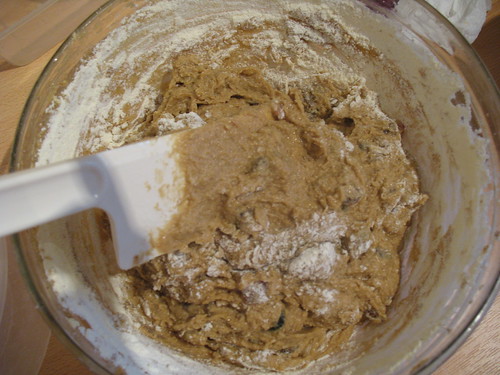
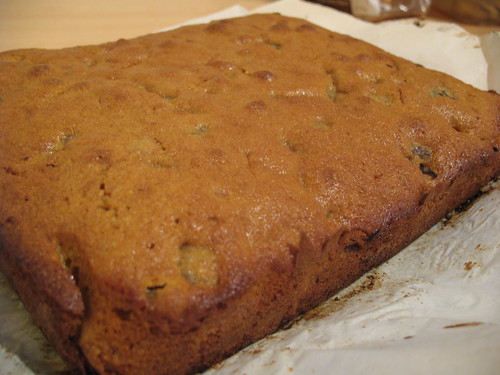
Anyway, it's a long weekend, and it's such a waste of time if I didn't bake anything. Right? :D
One hour later, the cake is in the oven, and hope it tastes better than last one.
Indeed the cake is better than the last one. I like the brown color of the cake and the texture is moister and softer. It's indeed a keeper!

FYI, I tweaked the previous recipe a bit. The previous recipe is here.
This is the tweaked recipe:
Ingredients:
230 grams unsalted butter
200 grams packed brown sugar
4 eggs
50 grams ground hazelnut
About 150gm mixed candied fruits, raisins
Splash of lemon juice
230 grams all-purpose flour
1 teaspoon baking powder
1/2 teaspoon vanilla essence
1/4 teaspoon salt
Methods:
- Pre-heat oven 160C, line the baking tin (20cm) with baking paper and grease it with butter.
- Beat butter, sugar until fluffy.
- Add one by one eggs, vanilla essence
- Fold in ground hazelnut
- Splash some lemon juice on the fruits, then cover the fruits with flour. Like this they are not stick to each other.
- Fold in fruits in the batter
- Sift flour, baking powder, salt
- Add progressively into the batter, fold in until all are well incorporate.
- At this point, the batter is 'heavy'.
- Spoon the batter into baking tin
- Bake in the oven for about 1 hour on 160C, then reduce to 150C and bake until about 30mins-1 hour. Test with skewer, when the skewer comes out clean with a bit of moist crumbs.


samedi, octobre 16, 2010
Winter in Autumn
It's only Autumn, but it's so cold. We have not change the daylight saving time yet, but it seems like we are ready to celebrate Xmas! LOL
Anyway, when the first cold weather hits, Tartiflette comes in mind. The potatoes, Reblochon cheese, the smell.. ahhh Bliss... It is lucky that I am entering the Consolidation phase in my diet. I did not regret to start the diet during the Summer. Hehehehe... In the consolidation phase I am allowed to have 2 Gala meals per week.
So this week it will be Tartiflette :D Big thanks to Chef Sylvain who did the ingredients shopping :D
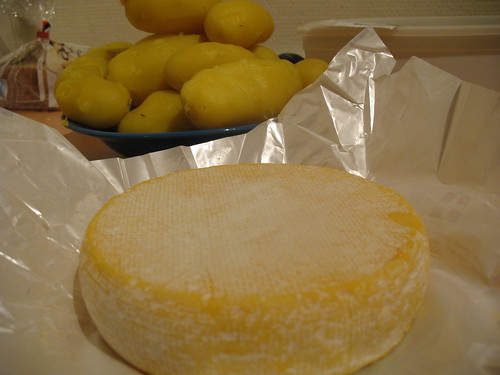
The basic and important ingredients are potatoes and Reblochon cheese. Get the Reblochon de Savoie.. yummmaaayyy!!
Then you may add in cream cheese (creme fraiche), onions, ham, bacon bits, turkey ham... Depends on your liking.
Steamed bio organic potatoes. You can also boil the potatoes. Me like me potatoes steamed :D

Peel the potatoes, and slice the Reblochon.
Important Note: Keep the cheese crust!!!
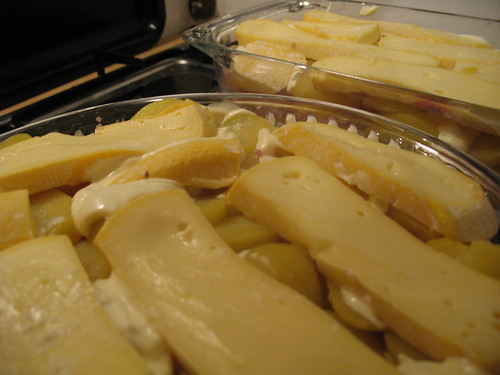
Spread cream cheese in the baking casserole. Slice the potatoes then top with the cheese slices.
Hop! Into the oven!
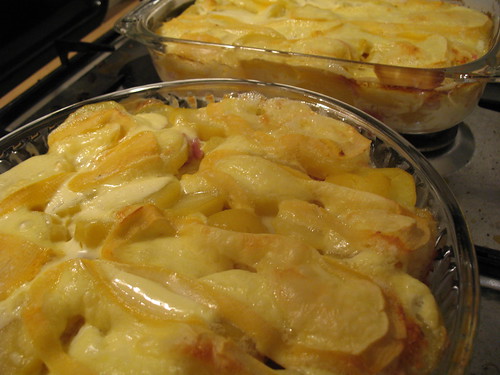
Serve hot!
As for the dessert, I baked Apple Pear Bread. It is an adaptation from the Apple Cinnamon Bread.
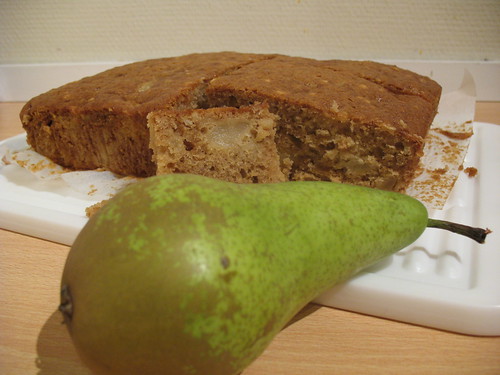
Anyway, when the first cold weather hits, Tartiflette comes in mind. The potatoes, Reblochon cheese, the smell.. ahhh Bliss... It is lucky that I am entering the Consolidation phase in my diet. I did not regret to start the diet during the Summer. Hehehehe... In the consolidation phase I am allowed to have 2 Gala meals per week.
So this week it will be Tartiflette :D Big thanks to Chef Sylvain who did the ingredients shopping :D
The basic and important ingredients are potatoes and Reblochon cheese. Get the Reblochon de Savoie.. yummmaaayyy!!
Then you may add in cream cheese (creme fraiche), onions, ham, bacon bits, turkey ham... Depends on your liking.
Steamed bio organic potatoes. You can also boil the potatoes. Me like me potatoes steamed :D

Peel the potatoes, and slice the Reblochon.
Important Note: Keep the cheese crust!!!

Spread cream cheese in the baking casserole. Slice the potatoes then top with the cheese slices.

Hop! Into the oven!

Serve hot!
As for the dessert, I baked Apple Pear Bread. It is an adaptation from the Apple Cinnamon Bread.

dimanche, octobre 10, 2010
Oat Cake Muffin
I got this recipe from a french website. This is one of the great dukan recipes which I approve of. Not that easy to get a nice tasty cake recipe while on diet.
Oat Cake Muffin (adapted from 'La Cuisine de Nathoo")
Ingredients
- 4 large eggs
- 5 tablespoons oat bran
- 3 tablespoons wheat bran
- 8 tablespoons powdered sweetener (like Canderel)
- 1 pot of petits suisses 0%MG (soft cream cheese)
- 1/2 teaspoon flavor of your choice (I used Caramel flavor)
Methods
Preheat the oven at 180 C (up and bottom heat).
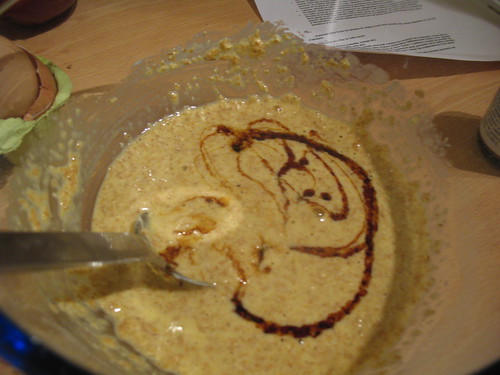
In a bowl, mix egg yolks, sweetener, cream cheese, both brans and the flavor.
Let it sit for 5 minutes.
During that time, in another bowl, beat egg whites until soft peak is formed.
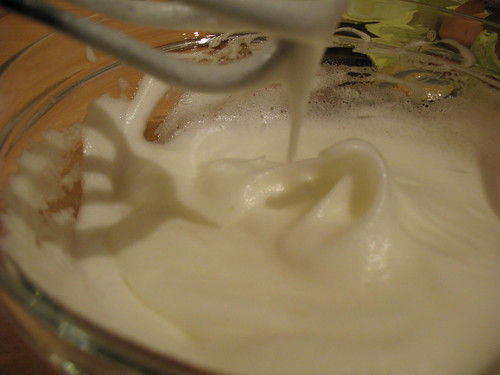
Add the egg whites into the mixture of other ingredients. Fold bit by bit until all is incorporated.
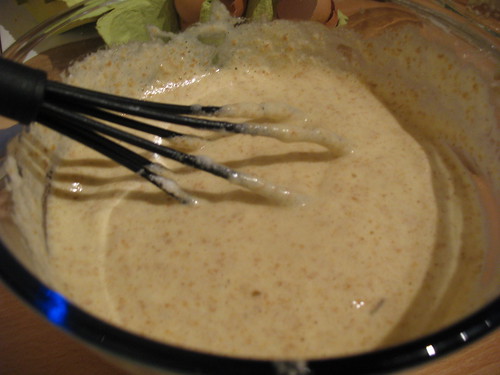
By this time the mixture is light and well mixed.
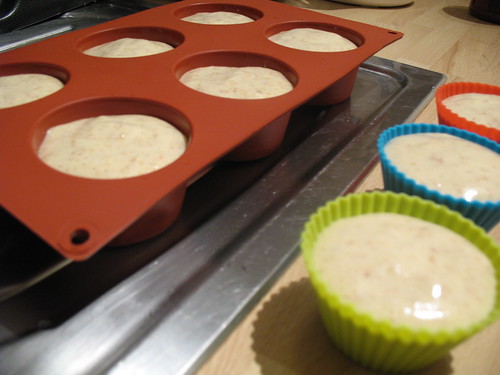
Pour the mixture into cake mold. I used muffin molds.
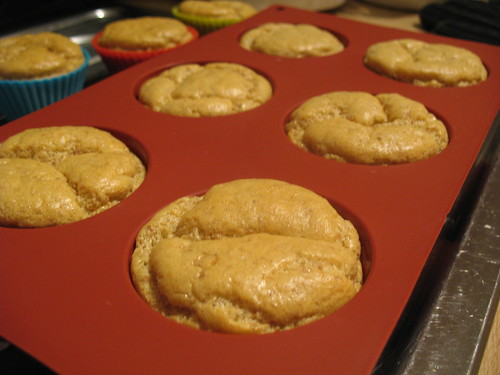
Bake for 30 minutes.
Oat Cake Muffin (adapted from 'La Cuisine de Nathoo")
Ingredients
- 4 large eggs
- 5 tablespoons oat bran
- 3 tablespoons wheat bran
- 8 tablespoons powdered sweetener (like Canderel)
- 1 pot of petits suisses 0%MG (soft cream cheese)
- 1/2 teaspoon flavor of your choice (I used Caramel flavor)
Methods
Preheat the oven at 180 C (up and bottom heat).
In a bowl, mix egg yolks, sweetener, cream cheese, both brans and the flavor.
Let it sit for 5 minutes.

During that time, in another bowl, beat egg whites until soft peak is formed.

Add the egg whites into the mixture of other ingredients. Fold bit by bit until all is incorporated.
By this time the mixture is light and well mixed.

Pour the mixture into cake mold. I used muffin molds.

Bake for 30 minutes.

vendredi, octobre 08, 2010
Apple Cinnamon Bread
Let's try something airy, with scent of spices and fresh fruit. Let's try Apple Bread!!! I like this recipe because it does not use butter, it uses fresh apple (no need to caramelize the apple) and it's so easy.
I made this apple bread last night around 11 pm. Yes that's at night and after I had my Body Combat at 8-9pm, cook for dinner, and some TV moment with hubby. It shows how easy and quick you can make this lovely bread for next day's breakfast.
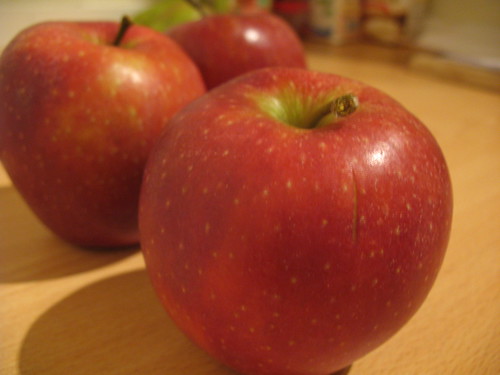
The recipe is adapted from a great food blog 'Le Petit Pierogi'.
Here it goes....
Ingredients
3 Cups All Purpose Flour
2 Tsp. Cinnamon
1/2 Tsp. Allspice - I skipped this
1 Tsp. Baking Soda
1/2 Tsp. Baking Powder
1/2 Tsp. Salt
1/2 Cup Vegetable Oil
1 Cup White Sugar
1 Cup Brown Sugar, packed
2 Eggs, Beaten
1/2 Tsp. Vanilla
2 cups apples, peeled, cored and coarsely chopped - I used red apples
1 cup broken walnuts - I used chopped almonds
2-3 tbsp apple cider (optional) - I used couple spoons of store bought Bio Apple Compote
Directions
In bowl, combine flour, cinnamon, allspice, baking soda, baking powder and salt; set aside.
In large mixing bowl, place oil, sugar, eggs, vanilla and apples. Stir into flour mixture. Add walnuts and mix (if using).
Then add in the apple compote. Actually I don't really need to add compote, but I bought it at the store day before that so might as well use couple of spoons.
Put the mixture in greased mould (loaf mould if you want it to look like bread loaf. I use the my usual square mould.
Bake at 150-160C pre-heated oven for 40-45 mins. But mine is done (slightly overdone I might say) at 30 mins. Use the skewer test to check the doneness.


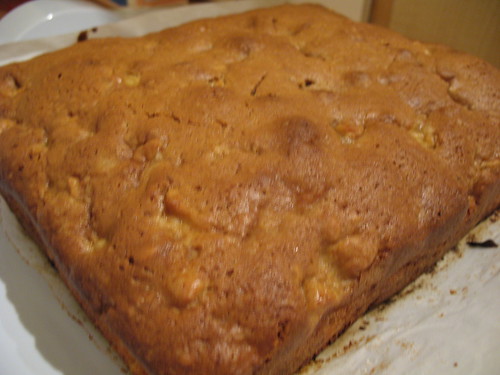
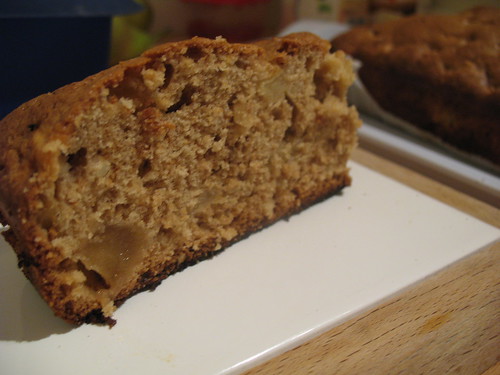
This is the recipe that can never go wrong!! :D
I made this apple bread last night around 11 pm. Yes that's at night and after I had my Body Combat at 8-9pm, cook for dinner, and some TV moment with hubby. It shows how easy and quick you can make this lovely bread for next day's breakfast.

The recipe is adapted from a great food blog 'Le Petit Pierogi'.
Here it goes....
Ingredients
3 Cups All Purpose Flour
2 Tsp. Cinnamon
1/2 Tsp. Allspice - I skipped this
1 Tsp. Baking Soda
1/2 Tsp. Baking Powder
1/2 Tsp. Salt
1/2 Cup Vegetable Oil
1 Cup White Sugar
1 Cup Brown Sugar, packed
2 Eggs, Beaten
1/2 Tsp. Vanilla
2 cups apples, peeled, cored and coarsely chopped - I used red apples
1 cup broken walnuts - I used chopped almonds
2-3 tbsp apple cider (optional) - I used couple spoons of store bought Bio Apple Compote
Directions
In bowl, combine flour, cinnamon, allspice, baking soda, baking powder and salt; set aside.
In large mixing bowl, place oil, sugar, eggs, vanilla and apples. Stir into flour mixture. Add walnuts and mix (if using).
Then add in the apple compote. Actually I don't really need to add compote, but I bought it at the store day before that so might as well use couple of spoons.
Put the mixture in greased mould (loaf mould if you want it to look like bread loaf. I use the my usual square mould.
Bake at 150-160C pre-heated oven for 40-45 mins. But mine is done (slightly overdone I might say) at 30 mins. Use the skewer test to check the doneness.


This is the recipe that can never go wrong!! :D
lundi, octobre 04, 2010
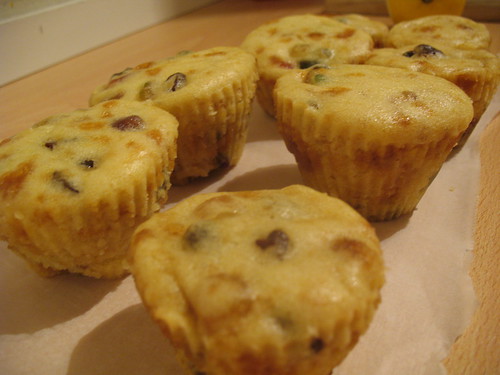
Steamed (Cup)Cake
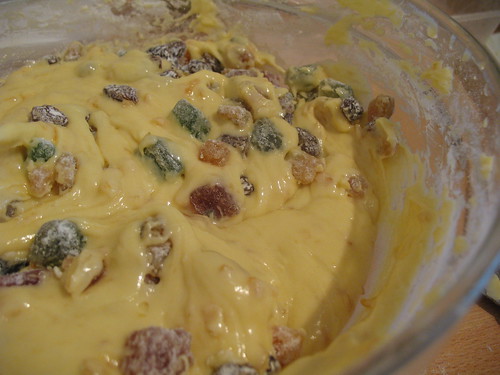
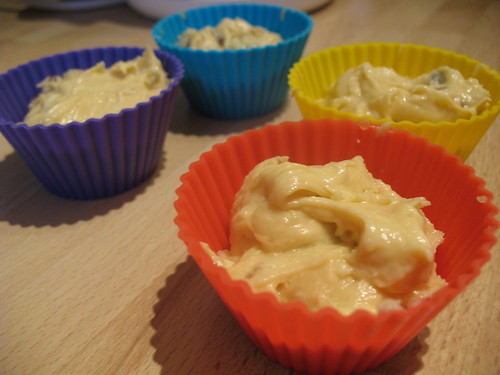
Another experiment this Sunday with my Mom's Steamed Cake recipe. Apparently the fruitcake recipe I made is different from this Steamed Cake. Although they both use mixed fruits, but they are actually 2 different recipes. When it come to steaming, I have a bit of problem. I have only a bamboo steamer medium size. Perhaps I should invest in a bigger steamer.
Anyway, as my mom mentioned, the tricky part is the caramelized sugar at the end. I made a couple of mistakes with this. One, I made the caramelized sugar ahead, so by the time I need to incorporate it into the mixture, it became hard. So my caramelized sugar appeared as blots in the cupcake. Second, I use hand mixer all the way, which is not good. By the time I add the flour and onwards, I should've used spatula.
So here's the recipe... (The measurement is a bit odd, I know)
Ingredients
2 glasses flour
3/4 glass fine sugar
1/2 glass fine sugar (to make caramelized sugar)
9 oz butter (I used 250 gm butter)
3 eggs
some candied cherries, 1/2 lb mixed fruits (I used 250 gm mixed fruits and raisins)
1 nutmeg (powdered)
lemon zest
1 tsp bicarbonate of soda
1 tsp cream of tartar
Preparations:
- Prepare the steamer with boil water.
- Mix butter, sugar, eggs.
- In a bowl, sift flour, bicarbonate of soda, cream of tartar and nutmeg
- Use spatula, add in the sifted ingredients.
- In another bowl, add some flour to the mixed fruits, mix together until the fruits are well coated
- Add the fruits to the cake mixture
- In a casserole, heat the sugar, let it come into boil.
- Quickly pour the caramelized sugar into the cake mixture and at the same time mix vigorously (It is advisable to have someone else helping you at this step)
- Then, put the mixture into the cake mold
- Steam for about 2 hours. (As I use 5 medium sized cupcake each time, it took 1 hour). Test by inserting skewer or knife in the middle of the cake, and it should come out clean)


Inscription à :
Commentaires (Atom)